Pages

Tuesday, 20 November 2012

Running local script in remote machine

How to run the local script in remote machine?
In manual testing we often used to do cross browser testing. The same thing we can do by automation using selenium webdriver. Followings are some steps to run  a local script in a remote machine.

Steps:
1. Download "selenium-server-standalone-2.*.jar" in the remote machine. Download from here
(If this jar is deprecated please try for a new jar.Just type selenium standalone jar for web driver in Google for new jar)
Note: Download the jar file in remote machine not in the local machine.

2. Open the command prompt in the remote machine and run the following command "java -jar < downloaded jar filepath>". This command will run a selenium server. If it will not able to run the selenium server, please just open this link in browser and click on  "okk".
Note: Be sure that java has been installed in the client machine. If not installed please install java first.

3. Then run the following java code from the machine from which you are going to initiate the remote machine.
import java.io.File;
import java.net.URL;
import org.openqa.selenium.OutputType;

import org.apache.commons.io.FileUtils;
import org.openqa.selenium.remote.DesiredCapabilities;
import org.openqa.selenium.remote.RemoteWebDriver;
import org.openqa.selenium.TakesScreenshot;
import org.openqa.selenium.WebDriver;
public class RemotelyRunningScript {
public static void main(String s[]) throws Exception {
System.out.println("coming to this only");
URL url = new URL( "http", "local host", 4444, "/wd/hub" );
DesiredCapabilities capabilities =DesiredCapabilities.firefox();
System.out.println("1");
capabilities.setJavascriptEnabled(true);
System.out.println("2");
WebDriver driver = new RemoteWebDriver(url,capabilities);
System.out.println("4");
driver.get("http://www.yahoo.com");
//File scrFile = ((TakesScreenshot) driver).getScreenshotAs(OutputType.FILE);
//FileUtils.copyFile(scrFile, new File("c:\\screenshot\\googlesearch-webdriverapi.png"));
System.out.println("opened yahoo page succesfully");
driver.quit();
}
}

Note: In place of "local host" please provide the remote IP. e.g. 192.145.12.45


Monday, 19 November 2012

Take Screenshot using Selenium Webdriver

Why Screenshot is required ?
While doing manual testing we often need to take the screenshot in case we come up with any issue. We can do the same thing for the Automation testing as well. While running a script there might be a chance of fail of the script. So in that case we have to take the screen shot for that failed script in order to report as an issue.
I am giving a simple example how to take the screenshot after opening "google.com" in firefox browser :-

     1. WebDriver driver = new FirefoxDriver(); // Opening the Firefox browser       
      2. driver.get("http://www.google.com/");
      3. File scrFile = ((TakesScreenshot)driver).getScreenshotAs(OutputType.FILE); // This
          will take the screen shot and will store in srcFile file.
      4. FileUtils.copyFile(scrFile, new File("File Path Location")); // Here you can change the
           path location you want.

Note : File path should contain the file name at the end. e.g. : c:\\temp\\screenshot.png.

After executing the code :
Just go to the path specified and you will able to find a screenshot.


Tuesday, 26 June 2012

Verify Tool-tip text in Selenium

tool-tip is small rectangular pop-up window that appears near an object in a graphical user interface (GUI) on mouse hovering that object. Tool-tip contains a brief text message identifying or explaining the object.

GoogleTooltip

                                                   Fig : Tool-tip for the Google logo

In Selenium we sometime need to verify tool-tips present in web pages to satisfy our automation needs. This post is dedicated towards how to automate this scenario through Selenium.


Get the Tool-tip text through Selenium Webdriver :-

To get the tool-tip text of a particular object we need to mouse hover the object. Through selenium we can automate the same. Just use the following selenium webdriver code to get the tool-tip text :
  1. WebDriver driver = new FirefoxDriver();
  2. Actions ActionChains = new Actions(driver);
    'Actions' class is used to generate a sequence of actions.
  3. WebElement toolTipObject = driver.findElement(By.xpath("//*[@id='hplogo']"));
  4. ActionChains.clickAndHold(toolTipObject).perform(); 'clickAndHold' method is used to mouse hover a particular object on the web page.


Verify Tool-tip text through Selenium :-

To verify tool-tip present for an object, we first have to locate the object on the page and the appropriate html 'tag-attribute' describing the tip. We have two popular tag-attribute through which tool-tips can be given for a particular object :
  1. 'alt' html tag-attribute. Example : 
  2. 'title' html tag-attribute. Example : <div id="object" title="Tool-tip for object">
To verify tool-tip, we have to access any one of the two tag-attributes through Selenium. 

A) Selenium IDE :
In Selenium IDE, we have a command called 'storeAttribute' through which we can store the value of a particular attribute present under a html tag. For tool-tip, we can store the value of 'alt' or 'title' tag in a variable by using 'storeAttribute' command which can be verified against the expected value of the tool-tip.
Example (Tool-tip for the Google logo) :
Command : storeAttribute
Target : id=hplogo@title
[id=hplogo - is the locator for the tool-tip object (Here, locator for the Google logo present on the page). title - is the tag-attribute]

Value : GoogleTooltip
[Name of the variable which stores the value of the tool-tip]


B) Selenium RC :
Selenium RC uses 'getAttribute' method which serves same purpose as 'storeAttribute' command in Selenium IDE.
Example (Tool-tip for the Google logo) :
  1. selenium = new DefaultSelenium("localhost", 4444, "*chrome", "http://www.google.co.in/");
  2. selenium.start();
  3. selenium.open("/");
  4. String GoogleTooltip = selenium.getAttribute("id=hplogo@title");
    [id=hplogo - is the locator for the tool-tip object (Here, locator for the Google logo present on the page). title - is the tag-attribute].
     
'GoogleTooltip' is the variable stores the value of the tool-tip.


C) Selenium Webdriver :
Selenium Webdriver also uses 'getAttribute' method to store the attribute value of a html tag.
Example (Tool-tip for the Google logo) :
  1. WebDriver driver = new FirefoxDriver();
  2. WebElement toolTipObject = driver.findElement(By.xpath("//*[@id='hplogo']"));
  3. String GoogleTooltip = toolTipObject.getAttribute("title");
'GoogleTooltip' is the variable stores the value of the tool-tip for the 'toolTipObject' object.

Wednesday, 23 May 2012

Run Selenium Tests on Cloud

Selenium IDE is an Integrated Development Environment for record, playback and debug selenium test scripts. As Selenium IDE is implemented as a Firefox add-on, it only works with Firefox. To run selenium IDE test scripts across multiple environments, we have to go through many configurations which needs many headaches.

To remove all these limitations and headaches, Sauce Labs has introduced Sauce Builder. Here are some important features about Sauce Builder :-

  1. Provides features like record, playback and debugging of selenium tests.
  2. Selenium 1 and 2 compatible.
  3. Run selenium tests in local browser and Sauce onDemand.
  4. Video and screen shots of every selenium tests.

Sauce Builder installation guide :-

Sauce Builder comes as a Firefox extension. Here are some to install it into your system :-

  1. Launch Firefox and navigate to the  Sauce Builder download page .
  2. Download Sauce Builder from this page and install.
  3. Restart Firefox.
  4. Open Sauce Builder by choosing Launch Sauce Builder item from the Tools menu of Firefox or press Ctrl+Alt+B from the keyboard.


For more information on Sauce Builder visit : http://saucelabs.com/docs/builder.

Wednesday, 2 May 2012

Implementing Firfox profile in Selenium Webdriver with Java

While automating a web application, we want the application to be opened in a customized browser. A browser without any theme/extension/add-ons or with customized settings; settings like pop-ups are allowed, certain sites are certified etc. The reason why we want a different browser profile is our regular use browser has several add-ons installed, several bookmarks, and some browser level restrictions which might hamper the proper functioning of the AUT. Firefox provides a good mechanism to manage different profiles of browser in the same machine. http://goo.gl/NTklV is a link which shows how to create a profile in Firefox. While creating a profile, we can customized the browser settings per our project need.

This tip is about how to implement a profile in Selenium Webdriver using Java. This implementation is of course after manually creation of the profile. The below code snippet demonstrates the implementation of profile in Webdriver :

ProfilesIni allProfiles = new ProfilesIni(); //Declare an object of ProfilesIni class

FirefoxProfile fProfile = allProfiles.getProfile("Profile Name"); //Get the specific Firefox profile information. "Profile Name" here is the name given to the profile while creating it.

FirefoxDriver wbdv = new FirefoxDriver(fProfile); //Pass the profile information to FirefoxDriver.

When a browser will be opened using “wbdv” object, it’ll be opened with the specified profile.

Tuesday, 1 May 2012

Selenium Overview


What is Selenium ?

Selenium is a software testing framework used for testing web applications.
  • It provides support to write test scripts in many popular programming languages, including C#, Perl, Python, Ruby, Java etc.
  • It also provides a great support in running the test scripts across multiple platforms, including Windows, Linux and Macintosh.
Mainly for these two reasons, Selenium is so popular in automation world.


Looking Inside Selenium

Selenium has many components that coalesce well to cook a wonderful automation testing system. Following are the components of Selenium :-
  • Selenium IDE
  • Selenium Remote Control
  • Selenium WebDriver
  • Selenium Grid

Selenium IDE :-  
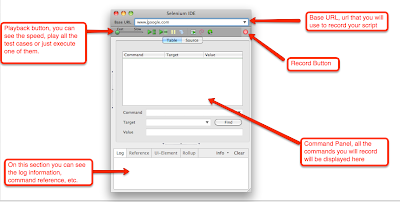
Selenium IDE was originally created by Shinya Kasatani in 2006 and implemented as a Firefox add-on which helps to record, playback and debug selenium tests. It records tests in its special test scripting language called as Selenese. Following are the features supported by Selenium IDE :-
  1. Record of tests and play them back.
  2. Debug test cases by setting break-points.
  3. Convert test cases to JUnit, Python, Ruby, C# or other formats.
  4. Support for adding user extensions.
  5. Locate web elements using IDs, XPaths etc.


Fig : Selenium IDE


Selenium IDE only works with Firefox. To run Selenium IDE tests across multiple browsers we need one server which will help IDE in doing that. Fortunately, we have one : Selenium Remote Control.


Selenium Remote Control :-
Selenium RC is a server which acts as a proxy between Application Under Test (AUT) and the test scripts.
It interacts with different browsers through the selenium core which is bundled with Selenium RC. It removes the need of installing selenium core on the web servers.


Fig : Selenium RC


Selenium Web Driver :-
Selenium web driver is the successor of the Selenium RC. Selenium Web Driver works in the same way users interacts with the web pages. In contrast to Selenium RC, it doesn't need a server to run. It directly starts a browser instance and controls it.


Selenium Grid :-
Selenium Grid is a server used to distribute tests on multiple machine so as to run tests in parallel. It cuts down the time required for running in-browser test suites.


Fig : Selenium Grid


Download Selenium from :- http://seleniumhq.org/download/


For study materials on Selenium :- 
  1. http://seleniumhq.org/docs/
  2. http://qtpselenium.com/selenium-tutorial/